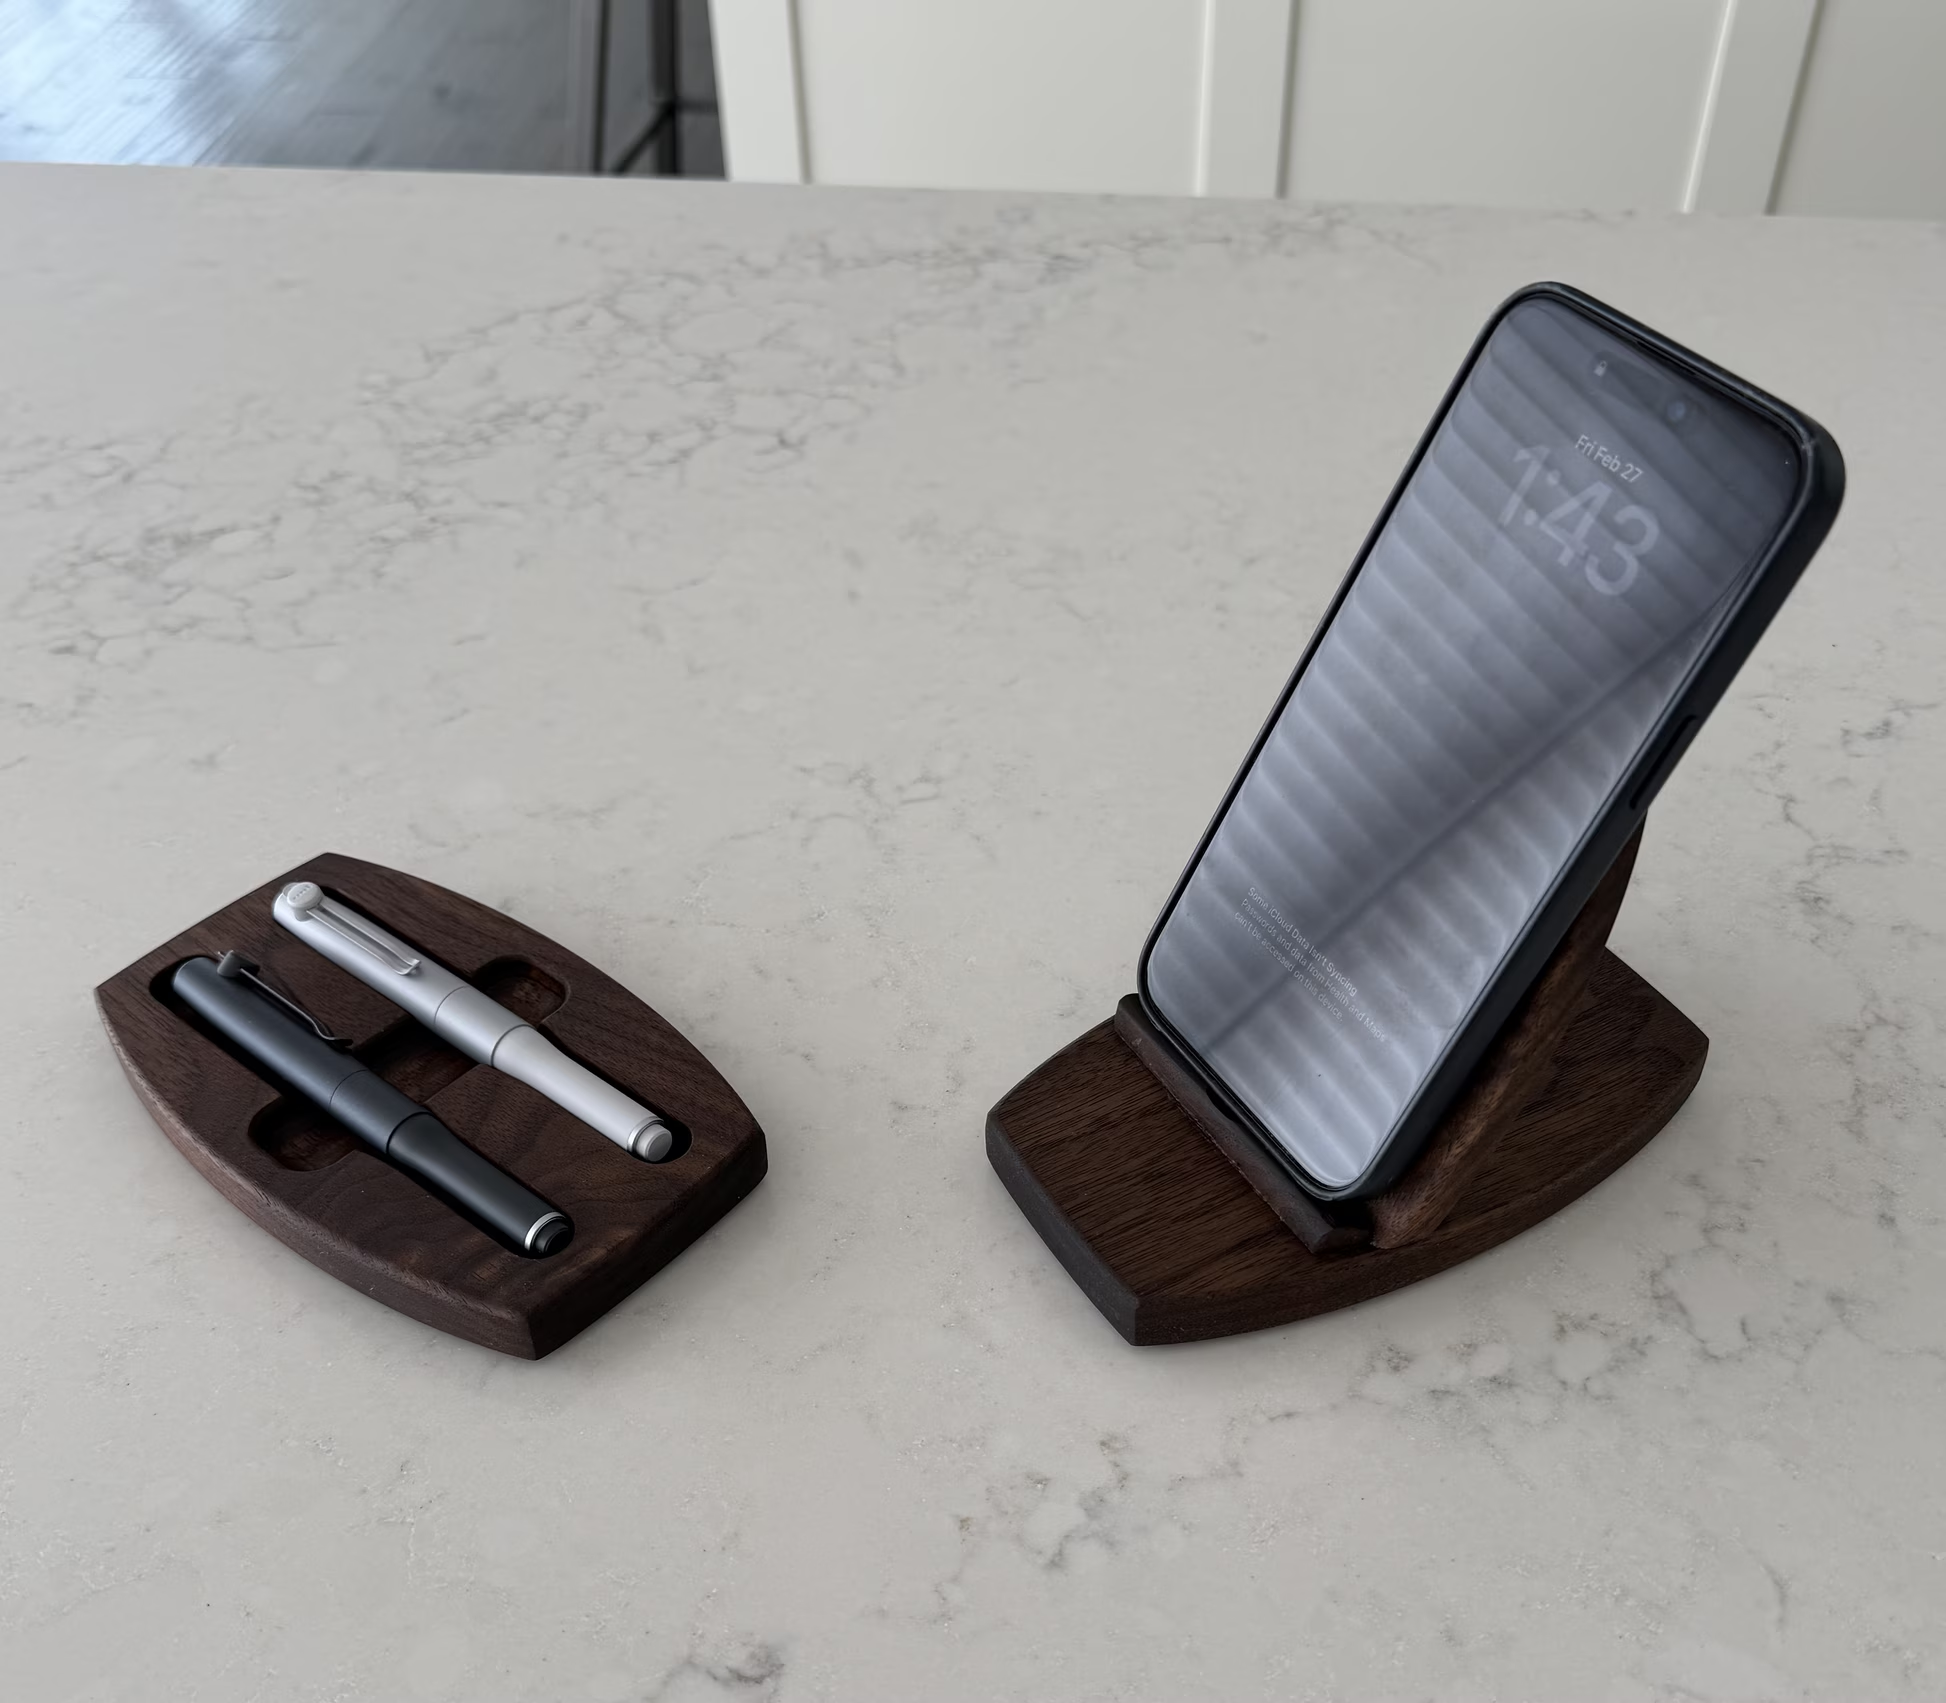
Pen Tray and Phone Stand
A custom pen tray for some high-end pens, and a custom phone stand.
Background
So the motivation behind these two pieces is not the usual thing. A while back I bought a couple of really nice pens from Japan. They look nice, have great balance and weight, and they write super-smooth. One has a 0.35mm tip and the other a 0.5mm tip. They sat on my desk for a while, looking rather out-of-place, obviously needing a more permanent place to be.
Also, I had purchased a gadget (shocker I know) that is an add-on to my Shaper Origin. If you’ve read some of the other posts on the Shaper Origin, you’ll know that I am a big fan. It is a super-cool tool that lets you do tricky joinery, inlays, and odd-shaped cuts, amongst many other things. The add-on that I bought for it is called the BenchPilot and it lets you work hands-free. You set things up, press the go button, and walk away from the machine.
Now there is a healthy online debate about why one wouldn’t just by a table-top CNC machine instead of the BenchPilot? It’s a great question, but for me the answer is twofold: I have the flexibility of using the Shaper Origin with or without BenchPilot (it detaches and reattaches very easily), and I only have to learn the features, complexities, and idiosyncrasies of the one machine. Also, all the Shaper Origin goodness, such as Shaper Studio and Shaper Trace, all still apply when working with BenchPilot.
So the BenchPilot needed a trial run and a pen tray for the new pens seemed a great fit for that. Deb had also asked for a phone stand for her new phone, and since it was about the same size and scale an effort as the pen tray, I added it to the list. I even used the same general design…hey, I like ellipses.
The Design
No Sketchup required here, I just went straight to Shaper Studio. This is Shaper’s online design tool that lets you download your work straight to the Origin to start cutting.

I made the outline using four ellipses, and while they were different sizes for the top/bottom vs left/right, I made sure to preserve the aspect ratio just to keep the Feng Shui on the piece. There is a really cool feature of Shaper Studio called ShapeShifter that lets you combine parts of various shapes to make new and different ones, and this was used extensively here.
The pen shape itself was done using another gadget from Shaper the Shaper Trace. You basically take a picture of the object (or a tracing of that object), and Shaper Trace converts that pic into an outline for you and stores it online. One still needs to clean up the outline a bit before it is usable, but it provides a great start. You can then import it into your other designs, which is what I did here.
Construction
BenchPilot
Once the designs were completed in Shaper Studio, I downloaded them onto the Shaper Origin and setup the BenchPilot to do the work. It was pretty cool and very straightforward. I have always been impressed by Shaper’s attention to detail and focussing on the customer experience, in my case it was a great one.
I should note here that both pieces were made entirely from scrap walnut I had lying around. It not only feels good to turn scrap into something useful, but it also entirely justifies my wood hoarding tendencies.


BenchPilot is essentially the metal frame surrounding the Origin, and it guides the router through its paces. I must admit, there was a little part of me that felt strange about being cut out of that part of the process, but that feeling went away fast enough as I was able to get on with other things.

Dry Fit
The pen tray was a single piece of wood, but the phone stand needed three pieces to make it work: the base, the back, and the support, which was a tiny piece just to give the phone a piece to stand on.
The back had a 30 degree cut to it’s bottom, which was set to the base with the Festool Domino, using two of the tiny 4mm dominos. It worked great and is super solid.

Sanding and Sanding
Sanding inside these grooves was tricky and it took a while.
I don’t know of too many woodworkers who love sanding. The best you can do is make it tolerable. One way to do that is with tools and techniques that can help minimize the drudgery. Introducing the sanding board.
The Sanding Board
A super cool way to sand small parts is to use a sanding board. It’s just a board with sandpaper stuck to it with spray glue (noxious stuff, be careful with that). So instead of moving sandpaper around your piece, you move the piece on the sandpaper.


Pro Sanding Tip: While the sanding board method works great, but sure to not sand thru your own body parts. I made that mistake here and while it doesn’t look too bad, there was a lot of blood on the workpiece. A definite no-no, it kinda ruins the finish.

Clamping Pressure
The phone holder had some tricky bits and some tricky angles, which complicated the glue-up somewhat.
The back piece was set at 30 degrees to the base, so that required some 30 degree clamping cauls which I fashioned out of some scrap 2x4’s I had lying around. With some double sided tape I was good to go.
The support piece required some baby clamps that I bought on a whim a while back. It was nice to use find a use for them and justify the $7/unit cost.

Finished
These were finished using my current standard for walnut: Rubio Monocoat Walnut 2C Hard Wax Oil, the good stuff. It brings out the lustre of the walnut, and makes it just a smidge darker.
In Production

Pen Tray
The custom fit of the pen tray turned out very nice, thanks in no small part to the Shaper Trace. The pens have a proper home now, and they are resting comfortably.

Phone Holder
The phone holder is doing it’s thing, holding phones. And it’s doing a great job at that.
I put some thin grippy rubber feet on the bottoms of both pieces so they don’t move around.
Materials and Tools
- Walnut from KJP Select Hardwoods
- Joinery done with the Festool Domino
- Rubio Monocoat - Walnut 2C hard-wax oil
- Shaper Origin and BenchPilot for the cuts