Building a New PC
The old one went kaput, so time for a new computer built with the latest and greatest parts.
Background
So around the beginning of the month, my desktop PC began to give up the ghost. I have my operating system (OS) on one drive and my data on another physical disk. At first it just looked like the data drive was going, meaning one of the disks in the RAID array was snafu’d.
However, things deteriorated rather rapidly from there, and all of a sudden the data drive was not reachable, and not long after that the OS itself disappeared. I just got a flashing cursor on the screen, and eventually that stopped happening too. No signs of life at all. Admittedly, this was a strange failure that I had not seen before, but sometimes tech fails in odd ways. I am pretty sure it was the motherboard that went south, though I guess it could have been the CPU too. It was 12 years old and had served me very, very well.
Given that it was built in 2013, it did not make a lot of sense to try and salvage anything, I just went straight to a new build, started doing research etc. I have built about a half dozen machines in my time, but there was a bit to learn here, since the last time I did a full build was over a decade ago. Things have changed a lot in some places, not so much in others. Details below.
The Design
Just as in my previous builds, I had two main criteria:
Speed
Everyone wants the fastest speed possible in their PC, but how you get there and the tech you choose can make the difference.
I am not a gamer (nor am I a crypto miner), so GPU speed was not a big thing. I do a lot of 3d modelling and the like though, so something CAD capable was needed.
CPU and disk speed were paramount though, so I did splurge a bit on the latest gen i9 Intel chips and a good motherboard. I also went pure NVME M.2 SSD throughout, which for those not in the business means fast. These products started appearing on the market in 2014/2015, just after my last full PC build. Instead of spinning disks fetching your data over a slow connection, these drives have not moving parts and are all on chips connected to the CPU via a super fast bus. This proved to be a great call, and I am super happy with the speed of the build. But I will leave you in suspense for now, see the results section at the bottom for details!
Silence
I really wanted a quiet machine. My very first build did not take this requirement seriously, and as such, I ended up with a PC that sounded more like a small airplane than anything. It was hard to sit by the thing for more than an hour without getting frazzled and annoyed. The fans were on high all the time and the disk drives seemed to whine at the worst possible frequency. I was not happy.
In this build I made a number of decisions that were based on noise level, and I don’t think I had to compromise too much.
The Purchase
One thing that has gotten a lot better since the last time I did this is the ‘configurators’ available on sites like Newegg. These help make sure you buy compatible parts that all work together nicely. It’s no fun when you go to plug something in and realize it’s the wrong pin configuration or something. Ask me how I know!

I give Newegg a B- rating overall. The parts configurator was great, prices seemed competitive with Amazon etc. My main complaint was that I paid for expedited shipping for the whole purchase (hey I am a geek, I cannot live without a PC for long), and while most of the order arrived pretty quick, the motherboard took almost a week longer than everything else to get here. And you really can’t do anything without a motherboard: literally everything plugs into it.
The Parts

The Case
I went with the Fractal Design case, similar to the one pictured here.
It’s a great case and boasts a truly silent design, with sound dampening padding on all available interior surfaces.

The CPU
For the CPU, I chose the latest from the Intel line, the i9 14th generation. I like AMD too though, but I feel bad for Intel these days, so let’s call it supporting an old partner.

The Motherboard
This was a bit of a departure for me. The Gigabyte brand of motherboards is targeted a bit more towards gamers, which means it has a lot of overclocking features and stuff for flashy RGB light do razzle-dazzle on all your components. I don’t need or even want those things as they can destabilize things, and my PC is hidden behind the desk anyway.
Even so, I went for it as the specs were great: it has the latest and greatest everything, including PCIe 5.0 and M.2.
From their website:
- Supports Intel® Core™ 14th gen processors
- Dual Channel DDR5:4 DIMMs with XMP 3.0 memory module support
- PCIe UD Slot X: PCIe 5.0 x16 slot with 10X strength for graphics card
- UC BIOS:User-Centred intuitive UX with Quick Access function
- Ultra-Fast Storage:5 M.2 slots, including 1 PCIe 5.0 x4
- Efficient Overall Thermal:VRM Thermal Armor Advanced & M.2 Thermal Guard XL
- Fast Networking:5GbE LAN & Wi-Fi 7 with Ultra-high gain antenna
- Extended Connectivity:HDMI, DP IN, Front & Rear USB-C® 20Gb/s
- High-Res Audio:ALC1220 & Audiophile Grade Capacitors

NVME 2.0 SSD
This is where a lot of the speed came from.
This is entirely new tech since my last build, and while I had heard of it before, I didn’t think it was going to be such a game changer. PCIe 5 NVME 2.0 SSD, write that one down!
There are four of them in my setup, 2 terabytes each for a total of 8TB. They are configured via the motherboard to be RAID 10, which is a combination of striping (for speed) and mirroring (for reliability).
This is what a modern “hard drive” looks like. All chips, no disks.

The Video Card
Now the hardcore gamers and the crypto kids are going to go for something like the Nvidia RTX 5090 or the like.
For me though, that would be a waste of money and energy. Those beasts require a lot of power, and power produces heat, and heat turns the fans on high. Fans on high make noise: see requirement #2 above.
So I went with the Nvidia T1000. Not sure why they felt the need to steal the model number from The Terminator, but there you are. It is a more “workstation” oriented video card, meaning that it is geared for 3d modeling, multiple monitors etc.
Multiple monitors: For those that do any kind of computer work, if you haven’t done so already, go for a multiple monitor setup. It is truly a game-changer. I’ve been using them for decades, long before Windows had any formal support for it even. It feels like I am working with handcuffs when I have to go back to a single monitor. There is great support in Windows now for lots of monitors.
Unlike its beefier counterparts, this video card it is smaller only has one fan, which translates into less noise. In summary, it seems perfect for my needs.
The Assembly
I took over the dining table for the assembly phase. Lot of moving parts in any new PC build. You even get a bunch of extra parts that you don’t need, for example they send parts for Intel chips and for AMD chips, but you are only every going to use one of those. Keeping tracking of the parts is super important.
The instructions are terrible. It doesn’t matter which part we are talking about, they are all atrocious. If you every want to try a PC build yourself, be prepared for that. The manufacturers websites are sometimes helpful, though not always, and YouTube is your friend here.

The Layout
I started by getting all the parts together and laying them out on the table. Opening boxes and pulling out the limited (very limited) instructions came next.

Diving In
Opened up the case, pulled out the parts that I wouldn’t be using (no need for any old fashioned hard drives in this build!)
Got some sorting trays (the yellow trays here) from Lee Valley for keeping the screws and other small parts. This seemingly trivial thing made a huge difference in keeping everything organized.

The Water Cooler
This was new for me.
The standard mechanism for cooling a CPU is to hook up a big fan to the back of the CPU. And that works, but those fans can be noisy (see requirement #2 above) so I figured I would give CPU water cooling a try.
It turns out to be easier than I thought, you hook up the cooling block to the CPU the same way you would a CPU fan, but there are hoses coming out of the block that run to a series of fans (quiet ones) across the top. You can see two of them in the pic up high.

Power Supply
Last but not least was hooking up the power supply. Nothing at all different here, this one had the same connections as the one I installed 12 years ago.
Power On
BIOS Boot
It is always a great moment after a build when you power things up and they all work properly. Don’t ask me what a CPU Biscuit is, I have no idea, but apparently I have 87 of them. (see pic)

If there are problems, there are usually a series of angry beeps produced by the motherboard or the offending components, or in a worst case scenario…crickets. In this case, everything worked great the first time, and I started configuring things in the BIOS and installing the operating system, Windows 11.
OS Boot

Installing the OS went pretty well, at least until Windows tried to do its whole activation dance. That wasn’t very well thought out, but that is a topic for another post.
The Results!
So let’s get to it then. How did all this turn out?
I must confess to being a little giddy at the results, they far exceeded my expectations…I figured at best the average performance would be 2x or 3x my old setup, but this blew me away.
Here is a key benchmark: when I build this website from scratch, that is I fire up the mechanisms that turn my raw pages into functioning HTML, it normally used to take around 90 seconds. Now, on the new machine, it takes…less than 6 seconds. I will save you from doing the math.
That is…
15x Faster
I could do a bar chart or something to drive the point home, but I hope you get it. Yes, that’s right, it is 15 times faster than my old machine at doing the standard stuff I do all the time. Wow! I attribute most of this speed increase to the NVME 2.0 SSD used for the OS and data drives. They are speedy.
Update
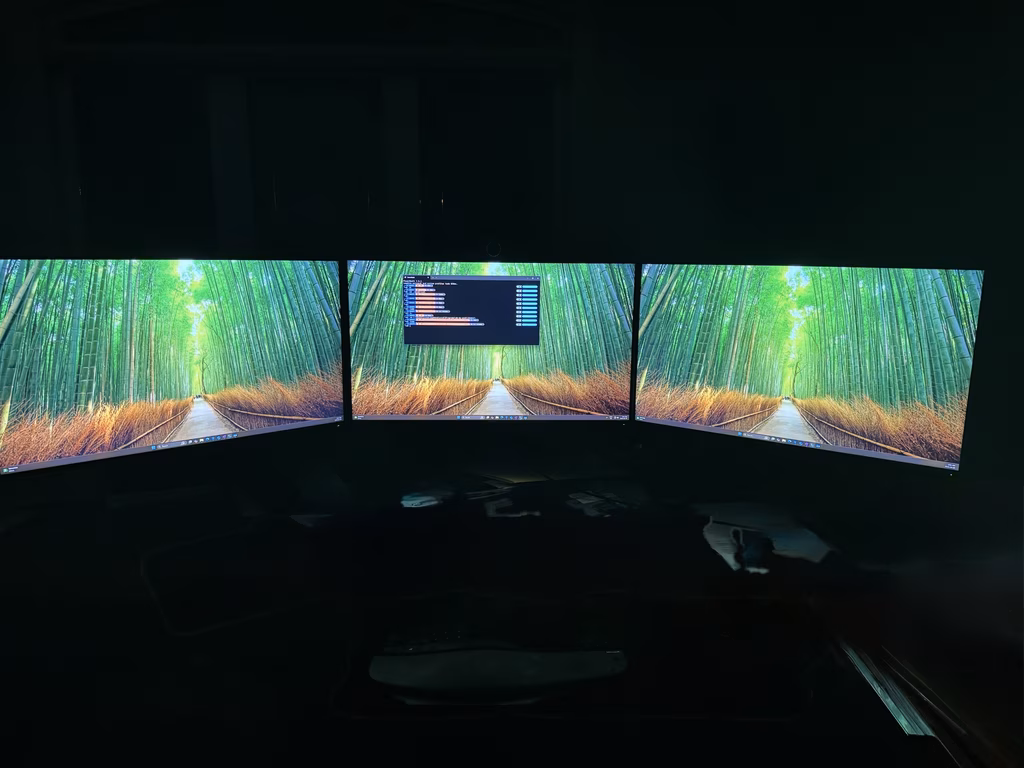
Since the new graphics card was so much more powerful than the previous one, and my monitors were the better part of a decade old, I decided to upgrade my monitors.


I went with the DELL 27 Plus 4K Model S27255QS, which was released in December of 2024.
It has 4k, a 120Hz refresh rate, and good HDR. It checks all the boxes except OLED, which I can live without since it quadruples the cost. Speaking of cost, they were on sale from $420 down to $350, and still free shipping.
It all adds up to double the pixels on the screens. Images and video are definitely better, but what I find the best for my aging eyes is the text: it is way easier to read, and scrolling is super smooth. A big improvement!

While I was at it, I added some monitor extension to allow more movement in the screens. Now I can pull them out further and align them the way I want.

Here is a good background to show off the 4K. I know you can’t see it in the pic above so you’ll have to take my word for it, it’s awesome.
Materials and Tools
- Most parts were bought at Newegg.ca
- Monitors are DELL 27 Plus 4K Model S27255QS bought from Amazon
- A Philips #2 head screwdriver, supplied from you local toolbox